Wednesday, June 5, 2013

Ultimate Tips: Physical Skills of Defense

Learning to Play Ultimate Frisbee


Posts here will emphasize tactics,  but since the game starts with physical skills, here's a brief introduction to the physical skills of defense.

Physical Skills: Defense


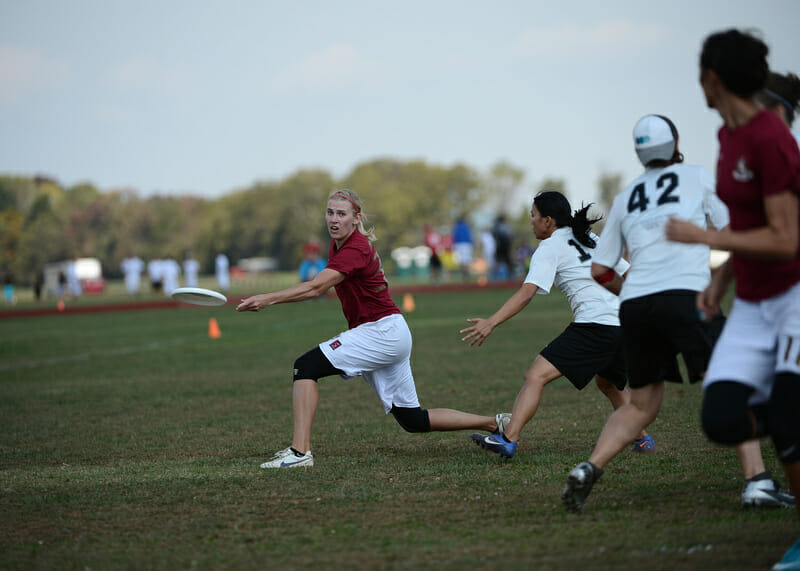
Ultimate Frisbee is a non-contact sport in the same vein as basketball. You can't tackle an opponent, or grab arms or push them out of the way, but as a defender, you'll move closely with the person you're guarding.

Much of defense depends on choices, so it will be covered more under Tactics: Defense, but there are two physical skills that apply to most strategies.

Marking and Forcing

When you guard the thrower, you are the 'marker' and play a special role. You can't prevent all throws, but you can deny the easiest ones. Keep your hands wide and watch the disc (though as you get more experienced, you may want to glance upfield to spot incoming cuts).

Foot blocks are allowed in some leagues, not in others. Hands are your best blocks: usually, you want to keep them low, as for most players, it's easier to throw under a blocker than over.


Most teams rely on the marker to 'force' the disc, preventing throws to one side. While it's possible to 'break' the force, with specialized throws like scoobers or simply with a good pivot, a good force makes throws to that side harder.

To force, stand with your body a step to the side where you are preventing throws. Reach out with both hands. Stay active, and step a bit to adjust to your thrower, but don't be drawn away from the side you are denying.


Many teams choose a side for forcing for an entire point or even a whole game, always forcing 'home' (toward the team) or 'away.' It's a practice I find too widely used (more thoughts on that under Tactics), but if yours does it, you do have an easy way to remember where the force is going.
    If you are the marker, stand away from that side (to force 'home,' stand on the side away from your team). If you are another defender, stand closer to that side (if your marker is forcing 'home,' stand closer to your team than the person you are guarding, since he or she needs to run toward your team to get a disc from an unbroken force).

If choosing the force is up to you, call out loudly which way you are forcing (or 'straight up' for no force). Often, it's best to force back in the direction the disc came, at least for a moment. More about that under Tactics.

If a force is broken, call it out ('Broken!'), so your teammates know to shift their positions relative to your opponents.
 
Sometimes teams will always force a particular way against a known player with a particularly good forehand or backhand. Whether this is in the 'Spirit of the Game' depends on how it's applied, but in any case, be aware that you may be asked to mark a certain way with certain players.

A special case of forcing is the 'trap' against the sideline. It works the same way as any other force, but the thrower now has a much narrower open area. It's particularly effective when forcing the throw into the wind.

The marker has trapped the disc, and the throw goes to the only open area, down the sideline.

Some teams always trap when the disc is near the sideline. I believe you can do better, especially near the endzone, but that's covered more under Tactics. Other teams always force 'middle' (away from the side) when the thrower is near the endzone, and still others trap as they apply a variation of zone defense to intercept throws down the line.


Guarding

Where's your target going? Wherever his or her hips turn.
     She can head-fake as much as she wants, or he can stop and start a dozen times, but if you want to know which direction is next, follow the hips.

If you are playing one-to-one matched defense, you'll stay with your person for the point (unless calling a 'Switch,' covered under Tactics). Then a 'Stack' is the most common offensive arrangement, placing all the teammates of the thrower in a column down the field.


On defense, you want to stay the side allowed open by any 'force' from your marker. If your marker forces 'home,' you stand closer to your team, since that's the way your defender must run to get an open throw. An effective 'home' force denies throws to the side away from your team. For an 'away' force, do the reverse.

Most players find it easier to face the person they're guarding, though some prefer to face the thrower. In any case, stand near your target, and note your position in the Stack. If you are far downfield, you are guarding someone with more chance of catching a long throw, so you need to shift accordingly. Play enough Ultimate and you'll hear the refrain, 'Don't get beat long.'
     You want to stop any catch by your target, of course, but if you must let one through, make it happen close to the thrower. Don't get beat long.

Ultimate Frisbee Tips: Catching


Learning to Play Ultimate Frisbee


Again, this blog will focus mostly on tactics, but since the game starts with physical skills, here's a brief introduction to the other physical skill on offense, catching.

Physical Skills: Catching


There are two basic rules for catching: use two hands when possible, and go to the disc to complete a catch.

A huge percentage of catching errors - with the throw in a good place but still dropped - result from failure to follow one or both rules. Use both hands and go to the disc!

Two Hands

A comfortable throw can be easy to catch one-handed, and you'll do it all the time during practice. And in-game, some throws can be reached with only one hand:


That said, it's safer to grab the disc with both hands whenever possible. It gives you a larger margin of error and makes it easier to retain when there's a struggle for the disc. ('Stripping' the disc by knocking it away is against the rules of Ultimate, once the catcher has control, but there's often a gray area before control is clearly established. Prevent disputes by making your catch undisputed.)

When reaching far with both hands, it's natural to use the 'pinch grip' (top photo, above), but when you can, put one hand above the other and trap the disc between the two, pancake-style:


 If the disc suddenly rises or falls - common in wind but possible even on a calm day with air pockets - you still have a good chance to trap it between your hands. Watch the disc as it comes between your hands, and grab it.


Go TO THE DISC


Run forward toward the thrower until the disc is in your hands. Receivers are too often seduced by a good throw into letting it come toward them, only to have it intercepted by a last-moment dash by a defender.

Who will get the disc in this photo below? The woman in blue has a slight edge, but a quick step by the one in white could easily put her in place. Whoever grabs the disc is likely to be the one who ends closer to the thrower, beating the other one by leaving her further downfield.


Moving toward the thrower assumes that the disc is between the two of you, as it is for many good 'cuts' (see more under Tactics: Good Cuts).

In some cases, like with a long end-zone pass, you may be running to catch up to the disc as it sails over your head. The principle remains - run to the disc - but in this case, the best approach is to sprint early. You'll claim the space around the disc and can gain a moment to adjust as the arc of the Frisbee becomes clear.


The Third Rule of Catching: Keep the Flow!

This moves into the realm of tactics, but it's such an important part of catching that it's worth including here. After you catch the disc, immediately look downfield for the next pass.

Ideally, you'll look to continue the motion of the disc along the line that it just came to you. If you caught the disc by running to the left, a good next pass may continue by going to the left again.

Why? Because everyone, including defenders, is still scrambling to reposition with the pass you just caught, leaving the field open in the area ahead. A smart second cut will place a receiver there right when you can make the next throw, a moment after you catch and recover.


If the first receiver (that's you!) catches the disc at 'A," then 'B' is an ideal place to look for a second cut, continuing the general line of the pass to A.

That won't always happen. If 'A' is against the sideline, there's no room to throw further that way. Or receiver 2 may not be open. Or a defender may force the throw away from there (often a good idea, and discussed more under Tactics: Defense). But you maximize your chances of making that pass by looking for it right away. Think of keeping the 'flow' of the disc in the direction it has already been moving.

It's not always possible. It's not always the best pass, depending on the context of the field. But it's nearly always the best pass to consider first. Consider it quickly.

Catch with two hands. Go to the disc. Then, right away, look downfield for your next pass!

Monday, June 3, 2013

Ultimate Frisbee: Tips on Throwing


So you're...

Learning to Play Ultimate Frisbee


Good fun!

Ultimate skills fall into two general groups, physical skills and tactics. This blog focuses on tactics, too often overlooked, but since the game starts with physical skills, here's a brief introduction.

Physical Skills: Throwing


There are two basic throws, backhand and forehand. There are plenty of other throws - hammers, push passes, air bounces, 'scoobers' - but none so essential as the backhand and forehand. Master those two in a variety of conditions and you'll bring a strong game to the field.

The Backhand

The backhand (above, right- and left-handed), is the standard throw most people learn first. It's much like a tennis backhand, and you shift your weight toward the foot of your strong hand as you throw, keeping the toes of your other foot on the ground until after you release. For detailed instructions, see this video.
Backhand Do's
  • Plant your left foot (if right-handed) and move your weight to your right as you throw
  • Snap your wrist on release to impart spin to the disc
  • Watch the angle of your release to keep it level. See Wind Tips below.

 The Forehand

Weight on the right foot, both feet on the ground.
The Frisbee forehand isn't like other throws. Your weight goes to your right foot (if right-handed), the opposite of throwing a ball. (And you do keep your left-foot on the ground, so you don't 'travel' while throwing, a rules violation.) Your forearm stays down, fairly level with the ground. A  small amount of the throw comes from your arm, and the motion begins with an unusual grip:


Some players move the first finger against the rim (next to the second finger) for more power, but all have the thumb gripped on top. From there, the motion relies heavily on wrist-snap. The arm moves, too, but far less than many people think, and the more the arm moves, the more the wrist must snap in tandem. The vast majority of iffy forehand throws lack sufficient wrist-snap. The other common mistake is to throw it with too steep an angle, tilting the top toward you more than intended, which can limit your range and accuracy. If this happens to you, tilt the disc farther away: you may even want to see the underside of it as you release.


Forehand Do's
  • Keep your right foot planted
  • Focus on wrist-snap to move the disc
  • Check your Frisbee angle as you release


To illustrate, look at this example from another of Brodie Smith's videos, where he hardly moves his arm while throwing a forehand.

Because I have several links to Brodie's videos, I should acknowledge their usefulness and their limitations. They're clear, they cover helpful topics, and they give good tips in bite-sized segments. But they necessarily cover only certain mechanics, and you may find you want elaboration on other aspects of a throw. Use them as a starting point, not the sum of all Ultimate wisdom.


Disc Angle

A solid, level throw will cover you for most of the game. A slight angle with the top titled slightly toward you (a 'bender') can give a nice arc to a receiver running to your left (for a right-handed backhand), but level throws travel faster and are generally more stable. Unstable throws nearly always turn with the top towards the thrower.

Outside-In ('bender') arc
An inside-out throw, where the thrower sees the underside of the disc, can help break the mark (see Pivoting Around the Marker), and in wind, they can help stabilize throws, particularly forehands. Again, don't overdo it. Level throws work for a great range of conditions.


Wind Tips

Keep your throws closer to the ground and release with more wrist-snap. An inside-out angle also helps in most conditions. Aim for shorter throws with a solid amount of forward force.

If you are throwing with a steady wind at your back and intend to throw far, a higher throw can help bring the disc downfield. Throwing upwind, you'll want to keep the disc much lower.


Throwing in a Game: Pivoting Around the Marker


A defender may stand one disc-width away from the thrower, moving to block any passes. To toss  around this 'marker,' the thrower typically pivots from side to side. These can be fakes or serious attempts to get around the marker, or most often, a combination of the two.

Often a marker will stand to one side, 'forcing' throws in the other direction. The force can be 'broken' by a variety of fancy throws - hammers, scoobers, high-release backhands - but often also with a basic throw and a good pivot. In any case, an occasional fake helps keep the defense reactive, even if the thrower doesn't intend to throw around the force.

The keys to good pivots:
  • Stay stable. Don't step so far or so wildly that you can't throw if you get an open path.
  • Stay ready. Holding the disc by your ear as you pivot probably won't fool your defender and it definitely won't help your throw.
  • Stay calm. You do want to move from side to side - 'calm' doesn't mean 'like a statue' - but don't panic. Unlike your marker, you can see the field, and you can decide when the throw begins.

Most teams will have a standard count by which you're expected to toss the disc to a teammate close behind you or to your side. This 'dump' pass generally shouldn't be your first option - more under Tactics about why, with exceptions - but it shouldn't come too late, either. Players wait too long to take a dump pass far more often than they take it too early.